
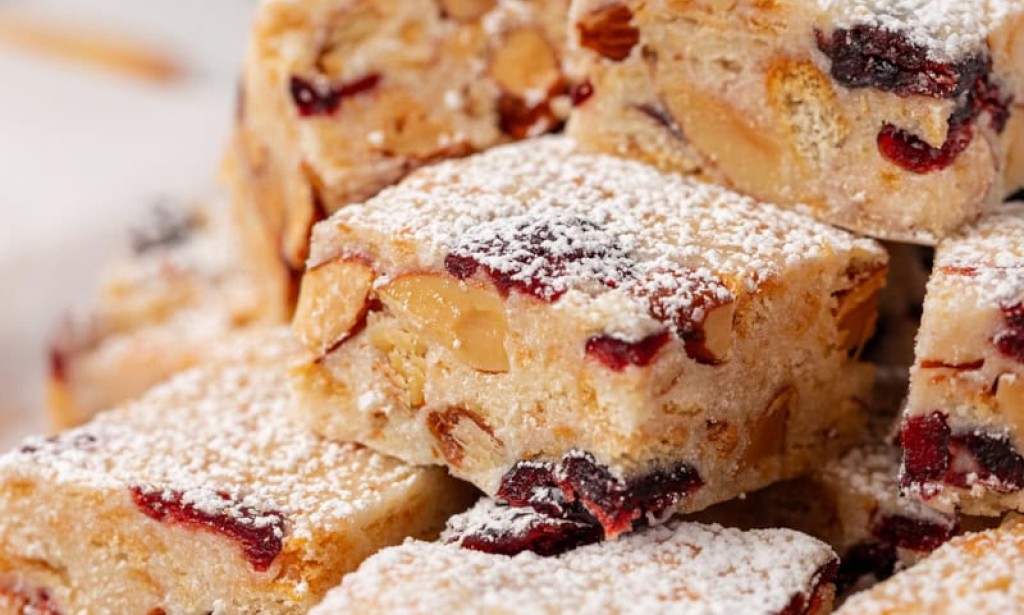

If you're looking to add something a little different to your holiday baking repertoire this year, look no further than Snowflake Crisp. This easy, no-bake treat is made with white chocolate, marshmallows, buttery crackers, and a festive dusting of powdered sugar. It’s the perfect sweet-and-salty bite for the holidays—quick to make, easy to slice, and great for gifting or adding to a cookie tray.
Why You’ll Love This Recipe:
-
No oven? No problem! This recipe comes together on the stovetop, so you don’t have to worry about making room in your oven during the busy holiday season.
-
Sweet meets salty crunch. Buttery crackers balance out the richness of white chocolate and marshmallows, giving you that perfect combination of creamy and crunchy, without being too sweet.
-
Perfect for gifting. These bars slice beautifully, travel well, and the powdered sugar finish makes them look extra festive.
-
Totally customizable. You can swap out the nuts, dried fruit, or even use rice cereal for a lighter crunch—whatever works for your taste!
-
Make-ahead magic. No need to stress last-minute—these bars set at room temperature and keep well, making them ideal for holiday prep.
What You’ll Need: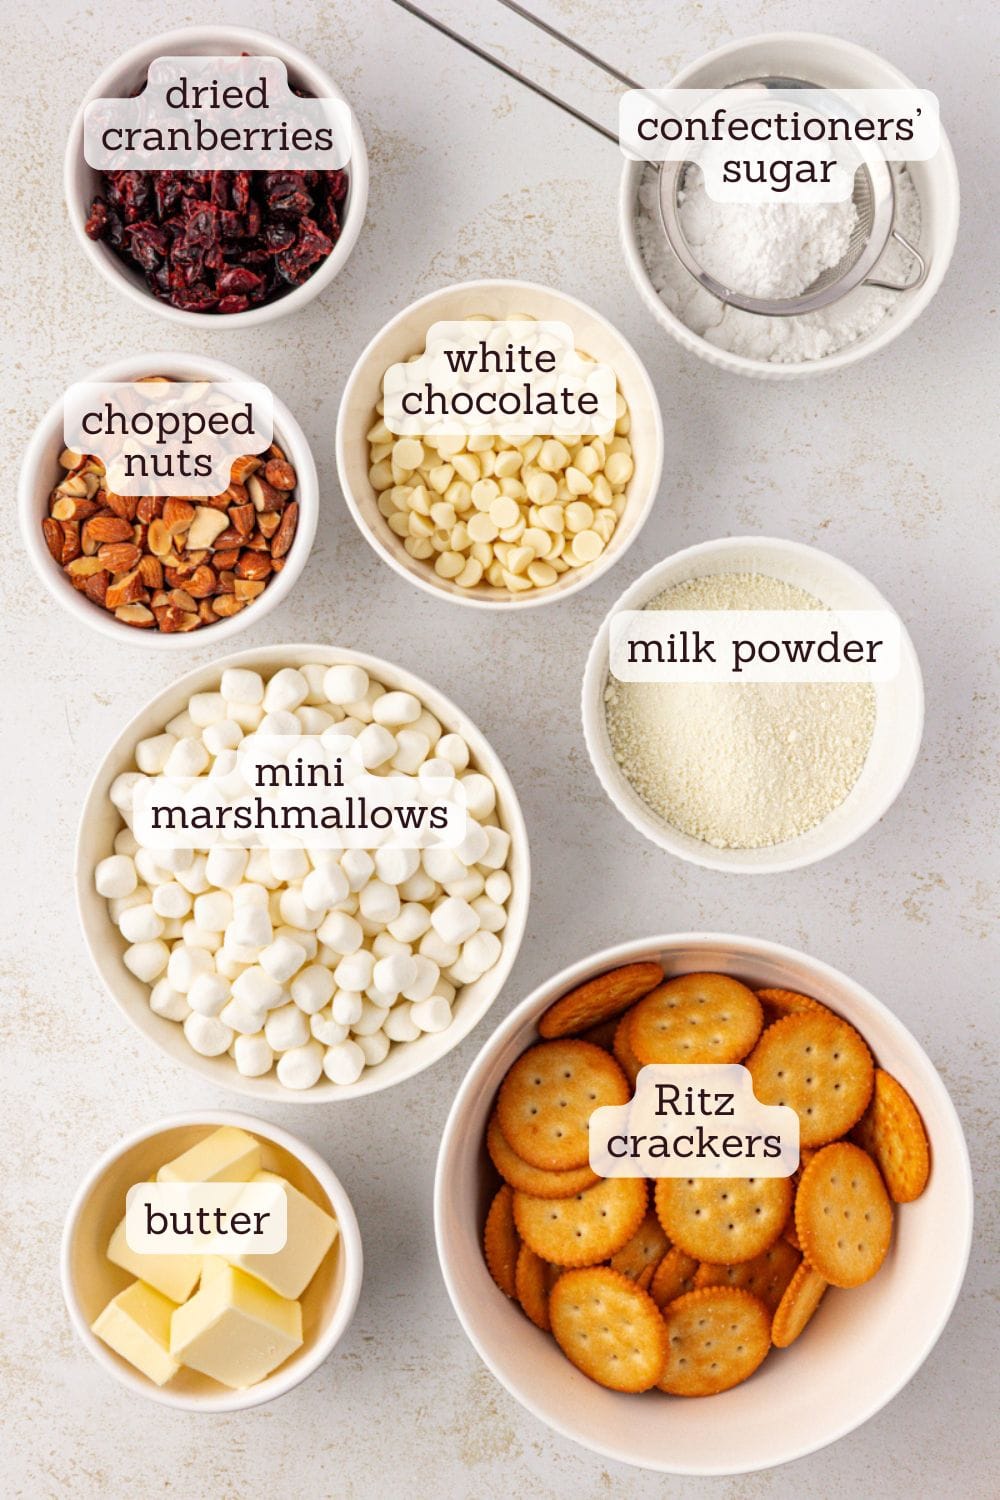
-
Buttery crackers – Ritz crackers give this recipe its signature sweet-salty crunch. Coarse crumbs work best here—they keep their texture once mixed with the other ingredients.
-
Mini marshmallows – These melt down beautifully and form the soft, creamy base. To ensure you get the perfect consistency, it’s best to weigh them (since marshmallows can vary quite a bit by volume).
-
White chocolate – Rich and smooth, white chocolate adds a subtle vanilla flavor that pairs wonderfully with the marshmallows. Use a standard 4-ounce bar or high-quality chips for the best results.
-
Milk powder – This ingredient is key for that distinct creamy, nougat-like texture. Nonfat dry milk powder works perfectly, though whole milk powder will add a richer flavor if you have it on hand.
-
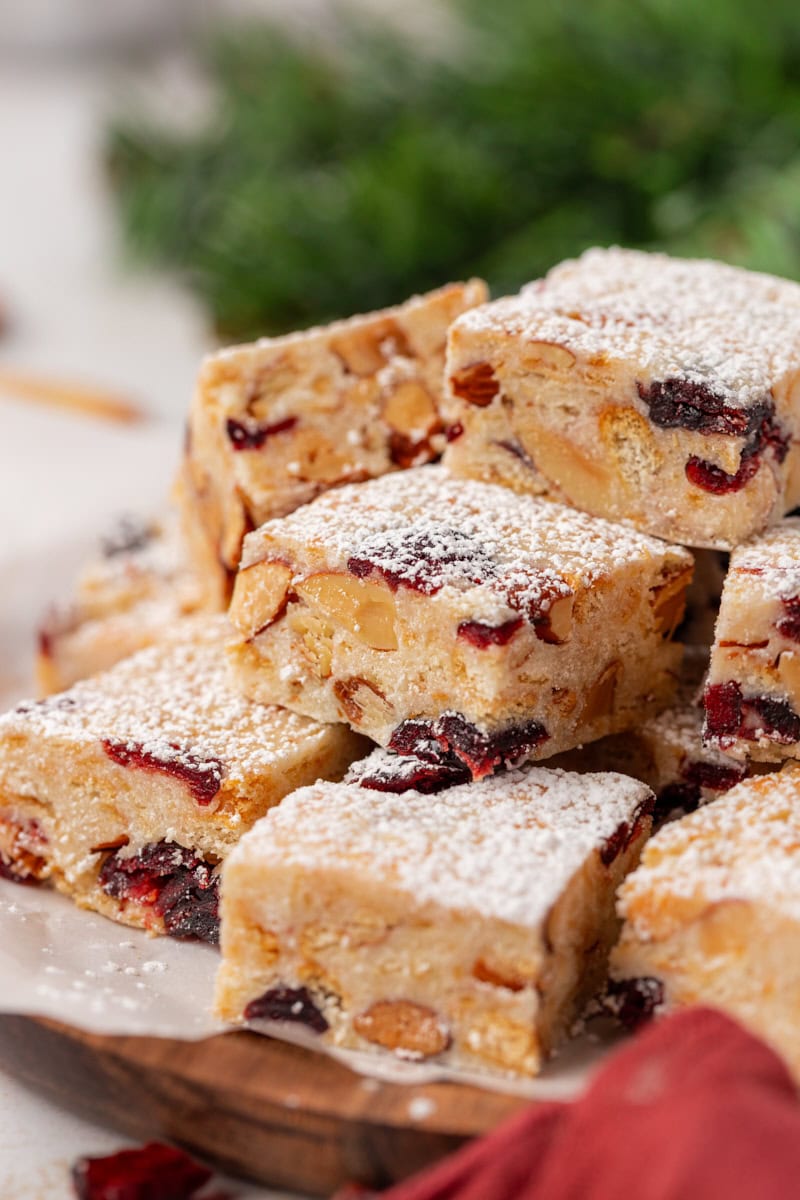
Dried fruit – I love adding cranberries for a tart pop of flavor and a festive red hue. You can switch it up with dried cherries, blueberries, or apricots if you prefer.
-
Nuts – Chopped nuts bring in extra flavor and crunch. Almonds, cashews, or pistachios all work great—pistachios are especially fun for the holidays.
-
Confectioners’ sugar – The final touch! A good dusting of powdered sugar makes these bars look like little snowflakes, adding to the holiday magic.
How to Make Snowflake Crisp: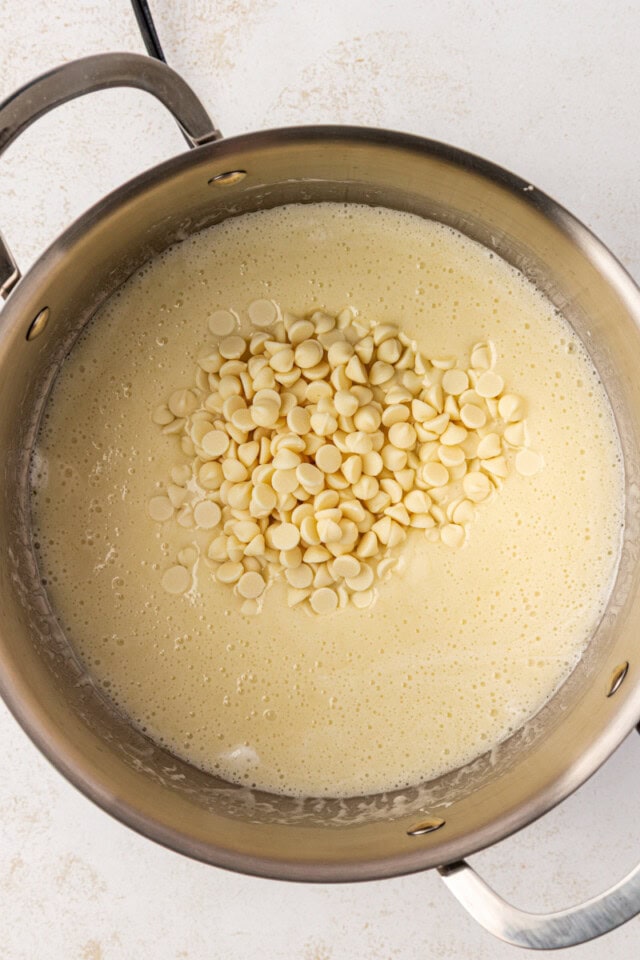
-
Prepare the pan: Line an 8-inch square pan with parchment paper. Leave a little overhang so it’s easy to lift the bars out after they set.
-
Melt the base: In a large saucepan over low heat, melt the butter. Once melted, add the mini marshmallows and stir gently until they’re fully melted and smooth. Add the white chocolate and continue stirring until it’s completely melted and mixed in.
-
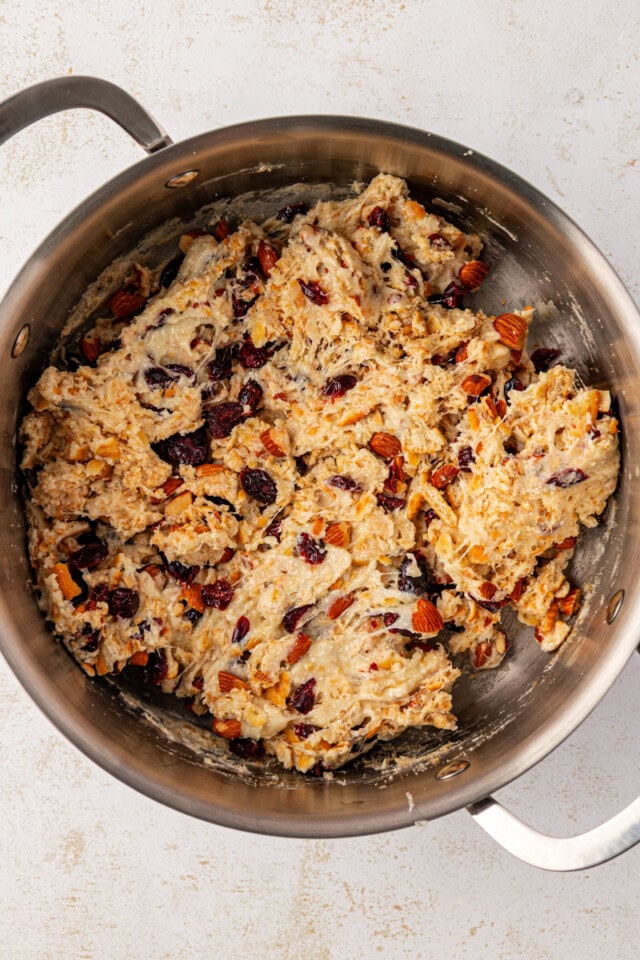
Stir in milk powder: Take the pan off the heat and stir in the milk powder. Work quickly since the mixture will start to thicken as it cools.
-
Add the mix-ins: Stir in the crushed crackers, dried fruit, and nuts until everything is evenly coated. The mixture will be thick, but it should still be workable.
-
Press and set: Transfer the mixture to your prepared pan. Press it down firmly into an even layer using a greased spatula or your hands. Let it cool at room temperature to set.
-
Finish with powdered sugar: Once the crisp has fully set and cooled, lift it out of the pan. Slice into squares and generously dust with powdered sugar for that classic snowflake finish!
Tips for Success:
-
Low and slow! Melt the ingredients over low heat to keep everything smooth and creamy. If the heat is too high, you risk making the mixture stiff or grainy.
-
Prep ahead: The mixture thickens quickly after adding the milk powder, so have all your add-ins ready before you start.
-
Coarse cracker crumbs: Aim for bite-sized pieces instead of fine crumbs. This helps keep the texture crisp and prevents the bars from becoming too dense.
-
Work fast, but don’t stress: The mixture will thicken when you add the crackers, but it should still be easy to work with. Use a sturdy spatula or greased hands to press it into the pan.
-
Let it cool at room temperature: Don’t refrigerate! The bars firm up more than necessary in the fridge—just let them cool naturally at room temperature for the best texture.
Variations and Serving Ideas:
-
Cereal swap: If you’re craving a lighter crunch, use crisp rice cereal instead of crackers. About 4 cups will work perfectly!
-
Switch up the add-ins: Try dried cherries, blueberries, or apricots instead of cranberries. For the nuts, pistachios are especially festive for a holiday touch, while cashews give a softer crunch.
-
Extra flair: Drizzle some melted white chocolate over the top for a little extra holiday sparkle, especially if you’re gifting these bars.
-
Serving suggestions: These bars are perfect for slicing into small squares, making them a great addition to cookie trays, dessert boards, or gift boxes. They’re rich, so smaller pieces work best.
How to Store:
-
Store your snowflake crisp bars in an airtight container at room temperature for up to 3 days. If your kitchen is on the warm side, you can refrigerate them, but keep in mind that the bars will firm up a bit more when chilled.
-
For longer storage, place the bars in a single layer (or between sheets of parchment) in an airtight container and freeze for up to 1 month. Thaw at room temperature before serving and dust with powdered sugar again if desired.
A Simple No-Bake Holiday Treat:
Snowflake crisp is the perfect no-bake dessert when you’re craving something festive, without the hassle of baking. It’s quick, easy to slice, and so adaptable to whatever mix-ins you have on hand. Whether you add it to your holiday cookie tray, package it up as a gift, or keep a few squares around for a sweet treat at home, this simple dessert will be a hit all December long.

You must be logged in to post a comment.